Introduction
For those that want to know that they can trust they food they are eating, here’s a list of cold-resistant crops you can grow to feed yourself. We’ll go through various crops based and highlight whether they’re calorie or nutrient dense, their growing culture, how to plant or sow them, the best time to plant or sow them. In addition, you’ll learn how long each crop takes to grow, and how to harvest and store each one. Praise God and let’s get into it.
Terms
Before that, here are some terms to know that will help you grow crops.
- days to maturity or days to harvest – how long it takes for a plant to fully grow after being planted
- sow – the act of planting seeds
- harvest – collecting the crop once its mature or fully grown
- loamy – soil made with a mix of sand, clay, silt, and organic matter
- sprout / germinate – when a plant first starts to grow
- culture – cultivation of soil; tillage
Potatoes
Potatoes are the best crop to have. Not only are they cold-resistant and suited for colder climates, but they are also drought-resistant. If this crop was your only food source you’d be able to get by. They are easy to grow, as they are a set-and-forget crop. They can grow in large volumes. In addition they offer magnesium and vitamin C.
Potatoes can be grown in many places. For example, you can grow them in a cold compost pile, raised bed with or without hilling, grow bags, 5 gallon buckets, or in ground with or without hilling.
Well-drained, fertile soil with pH levels between 6.0 and 7.0 are the best conditions to grow potatoes. They can be planted early to mid spring as they can handle cool soil and a bit of frost. It is best to plant seeds between 2-3 inches deep into ground, 12 inches apart from each other in rows that are 30-36 inches apart. Expect plants to appear between two to three weeks.
Expect full-sized potatoes to mature between 80 to 100 days to reach their full size or maturity, though some can mature as early as ten weeks. Small potatoes can be harvested beginning about 7-8 weeks after planting. The best time to harvest is in cool weather.
Row covers are a great way to fend off pests. If you don’t have that, simply crush yellow or orange potato beetle eggs under the potato leaves. Remove larvae and adults. Sponosad insectiside can also be used to get rid of potato beetles.
Do not eat potatoes that are exposed on the surface or that are green, as they have a lot of solanine content. Solanine is poisonous if consumed in large amounts. Side effects include diarrhea, vomiting, stomach cramps, nausea, headaches, and dizziness.
Potatoes are best stored in a dark, humid place that’s close to 4.4°C.
Beets
Beets are an early spring crop that can handle cold weather, frost, and snow. Cold weather can slow its growth, and warm weather can speed up its growth. They’re a great source of fiber and natural sugars. They are high in vitamin C, potassium, iron, magnesium, and zinc.
Beets grow in culture that has light, loamy soils with a pH above 6.0.
The best time to sow or plant seeds is when the soil temperature is 7°C. This can be eight weeks before a heavy freeze is expected. It’s best to plant or sow 15 seeds per 1 foot. Plant each seed half an inch deep in rows that are 12 to 18 inches apart. For an ongoing supply, plant or sow seeds every two weeks for eight weeks before regular heavy frosts are expected.
Most varieties have 55 to 70 days to maturity or harvest. If the beet was transplanted, it’s usually 14-21 days quicker.
To store beets you can cut the tops, wash, and keep them for up to 10 days at a temperature of 0°C and 95% relative humidity.
Kale
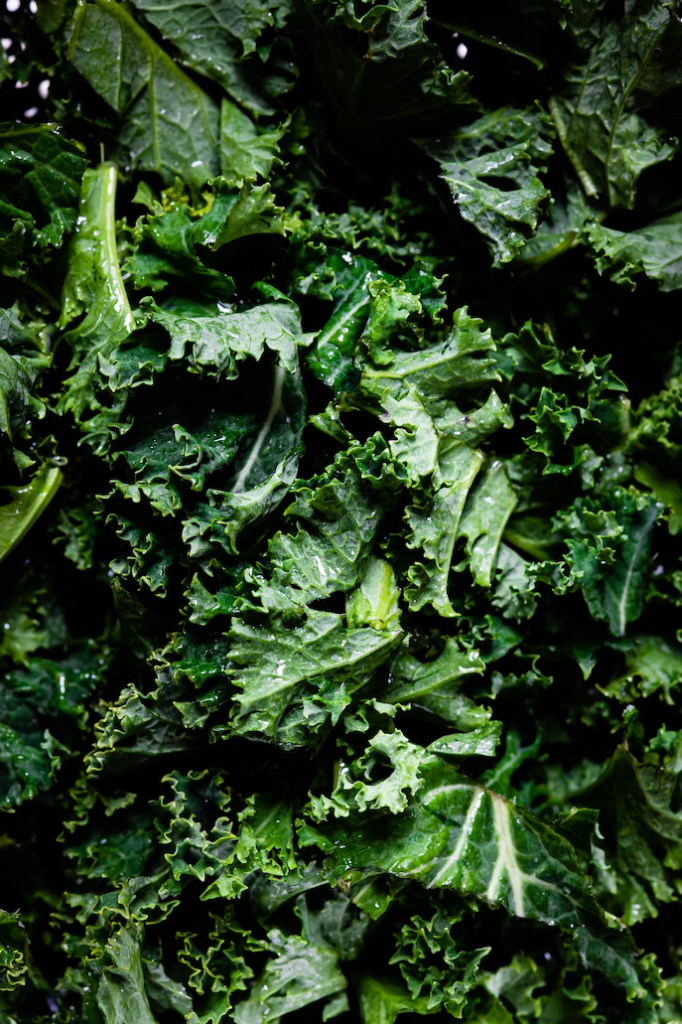
Kale is another cold-resistant crop that’s not calorically dense, but nutritionally dense. It can handle temperatures as low as -6°C and light frost, though its leaves will get wilted. It also tastes better when harvested during frost. To get tender leaves you can cover kale with a plastic tote or greenhouse plastic. It does need cold protection, such as a frost blanket, row cover, hoophouse, or cold frame.
Days to maturity can be 25 days for baby kale leaves, but bigger leaves will take around 62 days to mature. If it’s transplanted, it can grow 14 days faster than normal.
Kale can grow in many settings, including indoors and outdoors. This is true as long as there’s enough light. It does well in pots, garden soil, raised garden beds, window boxes, and other containers.
The best culture for kale to grow in is in humus-rich, well-drained, loamy soil with a soil pH between 6.5 and 6.8. Add well-rotted manure or compost ahead of the plants. It’s also best to plant kale in full sun in cooler weather, and in partial shade in warm weather. Avoid nitrogen-rich soil as this will make kale grow too succulent, drawing pests as a result.
Harvesting kale is as simple as clipping individual leaves that aren’t part of the core terminal bud or growing crown. The terminal bud or growing crown is the plant’s top 4-6 leaves. As long as it’s in tact it will keep growing new leaves.
To sow or plant kale seeds plant or sow them between early spring to roughly three months before expected fall frost. To bunch them, plant or sow 3-4 seeds every 12 to 18 inches. Plant or sow the seeds half an inch deep in rows that are 18 to 36 inches apart. Soil with high nitrogen is important, so add a few inches of organic matter like compost to a well draining soil mix for a healthy harvest.
Here’s how to store kale in the fridge for up to two weeks after harvest:
- Wash all the leaves.
- Dry the leaves completely with a paper towel or cloth.
- Group the leaves in a bunch.
- Wrap the bunch of leaves in a layer of paper towels.
- Put this into a resealable plastic bag.
- Put the resealable plastic bag into the fridge.
Cauliflower
Cauliflower is fiber-rich vegetable low in fat and calories. It can grow in temperatures as low as hearty to 10 degrees Fahrenheit or -12°C. It is a great source of vitamin C while supplying a good dose of vitamin B6 and magnesium, along with a variety of other trace nutrients. The best time to grow it is during spring and fall, as it grows poorly in warm weather.
Days to maturity for cauliflower is between 50 to 100 days or 85 to 130 days, depending on variety, or 7 to 12 days after blanching.
Cauliflower grows best in a culture that is well-drained, fertile soil with lots of organic matter and a soil pH level between 6.0 and 7.5. Consistent moisture during the growing season is needed. Regular irrigation gives the best results. You can plant or sow your seeds directly into your garden half an inch deep in rows that are three to six inches apart. Do this a month before the last frost date.
To store cauliflower you can put it in a plastic bag and keep it in the fridge for a week. For long-term storage you can freeze or pickle the heads. To freeze it:
- Cut your cauliflower into 1-inch pieces.
- Blanch it in lightly salted water for 3 minutes.
- Heads in a plastic
- Cool in an ice bath for 3 minutes, drain, and package.
- Seal and freeze.
Blanching is done only during the summer only with white cauliflower to keep your cauliflower from going yellow due to sun exposure. Coloured cauliflower varieties do not blanching. It’s done exactly when the small white heads are visible through leaves. Doing this outside of winter will raise the chances of your plant getting alternaria, which is caused by increased humidity.
Here are some ways to blanch:
- get the outer leaves over the head and tie them with a string or rubber band to keep the white colour
- crack the leaves midribs without breaking them & fold them over the heads until completely covered
Cabbage
Cabbage is an easy-to-grow low-calorie, nearly fat-free, and nutrient-dense food that is a good source of potassium, folate, and vitamin K. It provides fiber but is not a significant source of protein. It can grow in temperatures as low as 20 degrees Fahrenheit or -7°C, and can grow in frost or snow. It grows in all weather except through extreme heat or cold.
Days to maturity is around 70 days to grow 1 to 3-pound heads. For cool weather spring transplanting, it can take 10 to 14 days faster than normal. For late spring or early summer transplanting it can take 14 days longer than normal through direct seeding planting.
Cabbage grows in a culture where fertile soil has a pH level between 6.5 and 7.5. The culture needs consistent irrigation during the growing period.
The method to plant or sow cabbage is to plant it half an inch deep with plants being 12-18 inches apart in rows that are 18 to 36 inches apart. To plant cabbage for a summer harvest, start seeds indoors, sowing or planting them 6-8 weeks before the last spring frost. For a fall harvest, directly plant or sow seeds outside in mid to late summer. If your location’s very hot and dry, only plant them in late summer. This will keep your plants from drying out in the heat.
To harvest cabbage do the following:
- Cut each head at its base with a sharp knife.
- Remove any yellow leaves & immediately bring the head indoors or put it in shade.
- Keep the loose green leaves to use as protection for storage.
Another way to harvest cabbage is to pull the entire plant out and hang it in a moist cellar that has near-freezing temperatures.
Storing cabbage for long-term can be done through fermenting or canning it. Be sure to use the green leaves collected from harvesting as protection.
To fend off pests spray your cabbage with neem oil and pure castor soap.
Summary
We covered some crops you can grow in cold climates if you want to eat food you know you can trust. Which crops are your favourite to grow? Have your family or friends ever relied on growing their own crops? If so, how did they do it? Leave a comment below with your answer and be sure to share the content.

