DIY emergency survival shelters for any situation or season. Made with the nature that’s around you. Praise God and let’s get it.
Who cares about shelter when staying hydrated or eating food is more important? Staying warm and dry, hiding from wildlife, having a place to sleep, and a temporary place to keep your food is far more important. Shelter is priority number one.
Not all shelters are suited for all conditions. Different shelters are useful in different climates and conditions. For example, there are shelters good for wind and rain, warm and dry, snowy and cold, and other situations.
For Just About All Situations
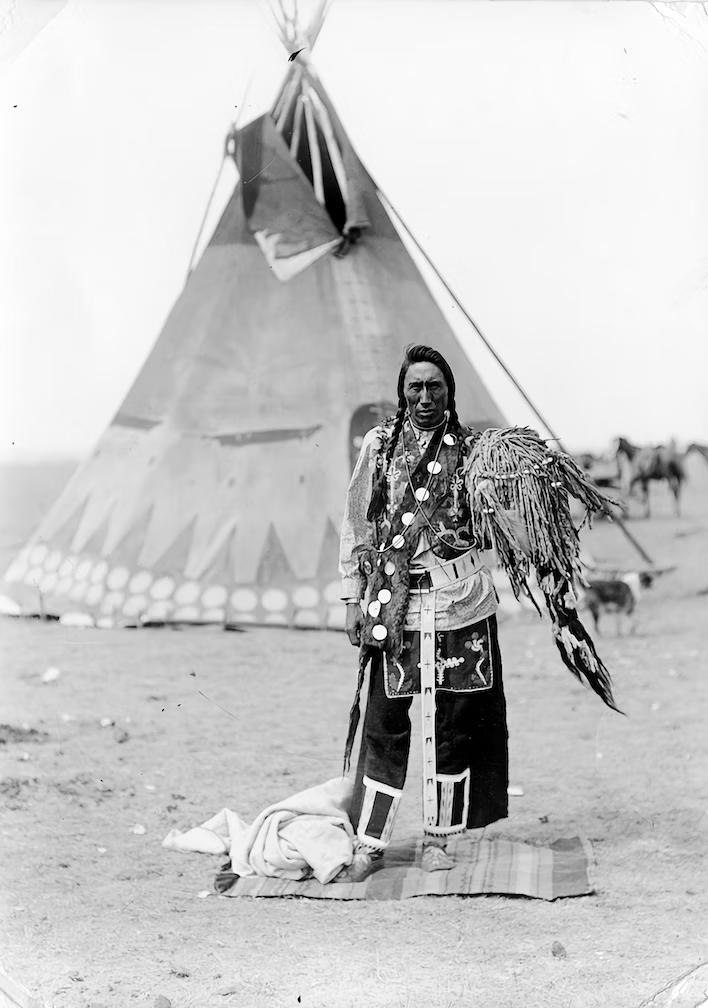
The round lodge shelter is what you need when you’re facing wind, rain, cold and/or sun. It’s a tipi with a solid doorway, and its smoke hole lets smoke leave through the roof. This lets you light a tiny fire inside to stay warm. On top of that, you can cover it with grass, a thick coat, or leaves.
Beating the Heat
If you’re trying to beat the Heat the ramada shelter is your best bet. It’s got a flat roof that won’t keep the rain out, but will block all the sun and heat while letting you chill in the shade.
You can make it with four posts, light beams, and a big covering like tarp, a mat, or brush. Feel free to add walls to stop the night time breeze and chillier weather.
Substitute Methods for Beating the Heat
There’s days where the heat and sun need to leave. For those days, double-roofed shelter is your go-to shelter for being cool. You’ll need two tarps and several dozen feet of rope.
Grab your stuff and take these steps to build one:
- Find or dig your own low spot on the ground.
- Lay one of your tarps over the low spot.
- Nail each of your nails or stakes at one corner of the tarp.
- Tie your tarp tightly to the stakes.
- Tie the other tarp into place to leave one foot of air space between two tarps.
- You can fold over a bigger tarp to make two layers.
- Tie the tops of the four stakes to your four strong anchors object, like a stake, rock, log, or anything heavy.
When It’s Too Cold or There’s Too Much Snow
The Igloo Rip Off
A quinzhee is that dome-shaped snow shelter. It’s kind of like an igloo rip-off, but way easier to build. Most snowfall types will let you pack snow together to make it. Here’s how you can make one:
- Pile up some moveable stuff under a tarp, like a backpack.
- Pile snow over the tarp and gear.
- Pack the snow down with two feet of thickness all the way around.
- Put three or four dozen 12-inch long guide sticks all around the dome.
- Dig the snow inside the mound until you hit the base of each guide stick.
- This is so you get identical thickness for the dome.
- Make a fist-sized ventilation hole in your quinzhee’s roof.
When There’s Way Too Much Snow
A snow cave might be your only option if you’re waist-deep in snow. It is the most dangerous shelter. Why? You risk low oxygen or being buried alive if its ceiling collapses.
To reduce how risky this shelter can be, use a deep, solid snow bank or drift. You can make a cold well tunnel towards a low spot where colder air falls out and collects by digging into its side.
Find the highest part of your shelter and dig up and over to make a bed, shelf, or platform to sleep on. Dig a small hole six inches wide somewhere in the roof for ventilation, especially if you’re blocking your entrance with something like a backpack or a big snow chunk.

When You’re Not Ready for Bugs or Snakes to Pull Up
There’s nights where you need to get off the ground. These can be wet, bug-filled places or places where snakes are lurking. Time to make yourself a hammock. There’s some stuff you need to grab. Get yourself a covering and a quarter inch of nylon rope.
Grab your stuff and follow these steps to make it:
- Start with one of the tarp’s long sides and roll it up halfway across the whole tarp.
- Roll up another long side to meet the first so the whole thing looks like a ten foot, two-roll bundle.
- Tie a sheet bend firmly to each end of the tarp, leaving roughly 15 feet of rope on each end to tie your trees.
- Pick leg-thick or thicker trees about ten feet apart.
- Firmly tie each end of rope to a tree as high as you can reach in case the rope slowly sags down.
- Wrap around the tree twice for good grip on the bark.
- Use two half-hitch knots for added security.
You might want a roof. That’s totally doable. Grab another tarp or covering and tie it between the same trees your hammock hangs from to make an A-frame wedge tarp above your hammock.
When You Need to Send Those Bugs Packing
You’ll find yourself in situations where bugs are trying to feed on you. You can add a small bit of cloth to each hammock line and soak it with bug repellent.
When the Snakes Are Too Brave
How could you not like snakes? If you really don’t like them and have cloths and some kerosene you can drive snakes away. Make sure to keep your cloths far from fire so that it doesn’t catch fire.
When It’s Looking Like Hurricane Season
Chill Out in an A-Frame Tarp Shelter
The A-frame tarp shelter offers awesome cover against wind and rain when it’s close to the ground. Also, it only takes ten minutes or less to build. When you lift it off the ground it can give you more airflow and block rain.
Here’s how to make it:
- Hang rope between two trees or similar support beams.
- Lay your covering over the rope line and tie down all four corners of it.
Chill Out in a Lean-To
One way to fend off rain and wind is through a lean-to shelter. It takes less than an hour to set up. Plus, you can use many materials to make it. It only has one side, so if the direction of the wind and rain changes, you’re no longer protected.
Let’s learn how to make it:
- Cover one side with poles, brush, or branches.
- Add leaves, grass, palm fronds, or any other vegetation on top.
The lean-to shelter does have downsides. It doesn’t keep heat in well. Next, it’s not going to shelter you when the direction of the wind or rain changes. On the upside, it’s quick and easy to build and is hard to see from a distance.
Chill Out in a Free-Standing Wedge
What’s got two sides and likes to keep the wind and rain out? A free-standing wedge or plow-point shelter. Specifically, it’s a two-sided, wedge-shaped lean-to with better weatherproofing and insulation. You’ll need a nine-foot sturdy pole and some material that traps air. Good examples are grass, ferns, moss, pine needles, brush, or pine boughs.
Here’s how to make one:
- Prop your pole in a tree’s fork or on a rock, stump, or two forked prop sticks.
- Cover the sides of the pole with tree branches angled at both sides of your main pole.
- Put it an an angle alongside both sides of the ridge pole.
- Put the ribs close together so your covering won’t fall through.
- Put two to three feet of vegetation to cover all sides of your shelter to keep yourself dry inside.
- Throw in a bough bed in your shelter to sleep easy.
- If it’s windy anchor your shelter with brush, sticks, twigs over your hut to keep the wind from blowing your covering material away.
Rain and Sun Defense
Introducing the Tarp Wing
If you know how to build a tarp wing, then rain and sun will be no problem. If you have a small or large covering you’ll block less or more rain. The wing ties up the opposing tarp corners. Two are up high and two are in lower positions. Don’t be surprised if it’s waving loosely in the air like a flag.
And Its Teammate the Wicki-Up
If you’re dealing with occasional rain a wicki-up is a solid shelter. It’s a small tipi made from poles, brush, and vegetation. It’s useful if you make it with thicker brush, grass, leaf coverings, and a steeper roof.
On the other hand, if it’s too hot and dry you can make a wider, shorter wicki-up made with light brush to give you shade and ventilation.
Here’s how you do it:
- Get several dozen poles, some with forks at the top.
- Lock a few of the forks together to make a freestanding tripod.
- Lay other poles around to make the tipi frame.
- Use vegetation as your roof, preferably wet and green material.
In general don’t light fires inside your shelter so you don’t burn all your stuff. If your vegetation is wet and green you might be safe enough to light a tiny fire inside.
If You Have to Move Around a Lot
You hunt like a boss, but your game moves all the time. No problem. Make yourself a tipi and you’ll have a versatile house you can pick up and take with you. All you need is poles, rope, and a covering.
A pole is anything that acts as the structure or the frame of the tipi. You can use the rope to tie the poles together, or you can hook a few porked poles, then lock the first three of four of them. The covering is there to protect you from the elements, like rain, sun, wind, etc. Good examples of coverings are hides, canvas, parachute material, sails, or tarp.
So how’s it done?
- Put your other poles in a circle around your main supports.
- Pull your covering into place, then tie it down well. Size your framework to make sure your cover covers all of it.
- Bring the tarp together to allow a door flap that can be opened or closed, depending on how the weather is.
When You Already Have a Shelter and Just Need to Sleep
This isn’t a shelter, but a bough bed is a great addition to your shelter. Some good bedding materials to make it with are leaves, grass, dead grass, leaves, or boughs like evergreen, pine, or cedar. Here’s how you make one:
- Make the soft bed, beginning with the bed frame.
- Roll up two logs side-by-side three feet apart.
- Make sure they’re longer than your height.
- Fill the space between the logs with the bedding material.
If there’s snow everywhere make sure to have your mattress at least six inches off of the frozen ground or snow when laying down. You can do this by adding more bedding material. This also helps make sure your mattress doesn’t cave in too much.
Summary
There are emergency shelters for all situations and seasons. In most situations you’ll probably be good with a round-lodge shelter since it protects you from most conditions. However, other shelters are great for specific conditions.
Ever built an emergency survival shelter? If so, which type of shelter did you build? How long did it take you to build it? What materials did you use?
Leave a comment with your answer and be sure to share the content. God bless and have a great day.

